Making your own clothes can be a fun, creative experience, especially with the right pattern. You can find a variety of patterns — sometimes for free — to make all kinds of clothing and accessories. Check out the different types of clothing patterns for men and women.

Making your own clothes allows you to be creative. You can pick the materials and colors you like best. Plus, you can tailor the pattern to fit your body contours. Best of all, you can enjoy something unique that you made.
Whether you’re new to DIY clothes or you’ve been at this for a while, there is always something new to learn. Here’s a closer look at different types of clothing patterns for men and women.
Contents
- Types of Fabric Patterns
- Sewing Patterns for Menswear and Womenswear
- What Is a Sewing Pattern and Why Should You Use One?
- What Are the Different Types of Sewing Patterns?
- How to Cut Out Sewing Patterns
- What’s a Seam Allowance?
- Free Sewing Pattern
- How to Select a Sewing Pattern
- Clothing Pattern Terminology
- Measurement Terms
- Fabrics to Use for Particular Types of Apparel
- FAQs
Types of Fabric Patterns
Paisley
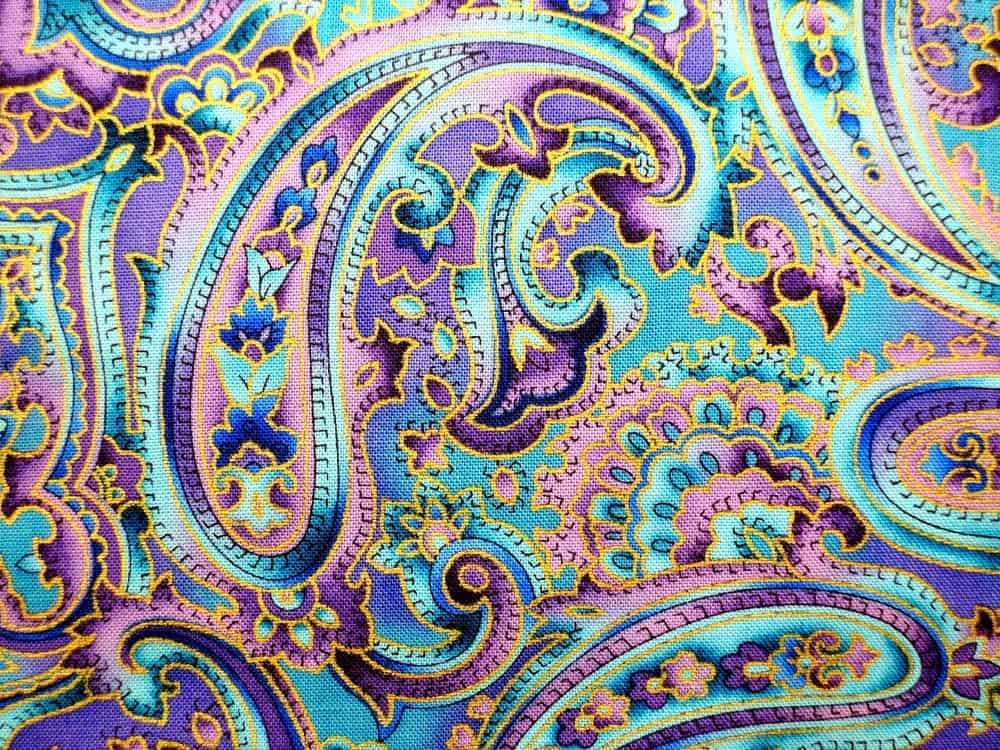
This pattern traces its origins back to the Middle East. Paisley is bold, so it’s best to pair it with solid colors. This print consists of tear-drop-shaped designs often arranged to create a floral pattern. Sometimes these prints are made up of especially “loud” colors. Toned-down versions come in several shades of the same color. Either way, this design tends to call a lot of attention to itself, so choose it carefully.
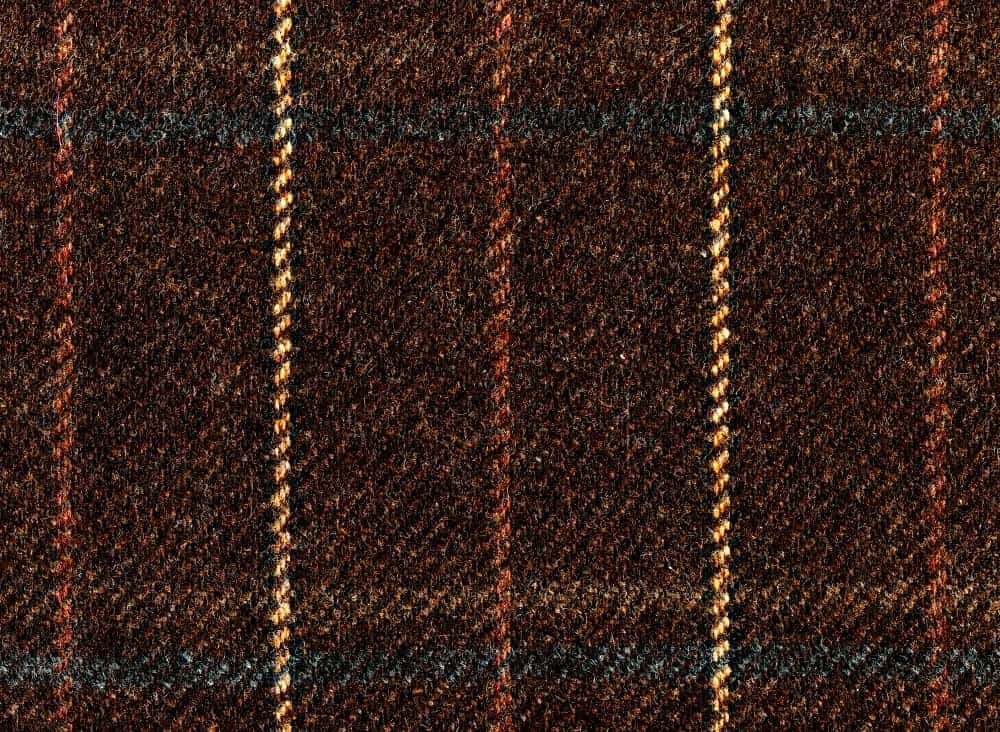
Pinstripes
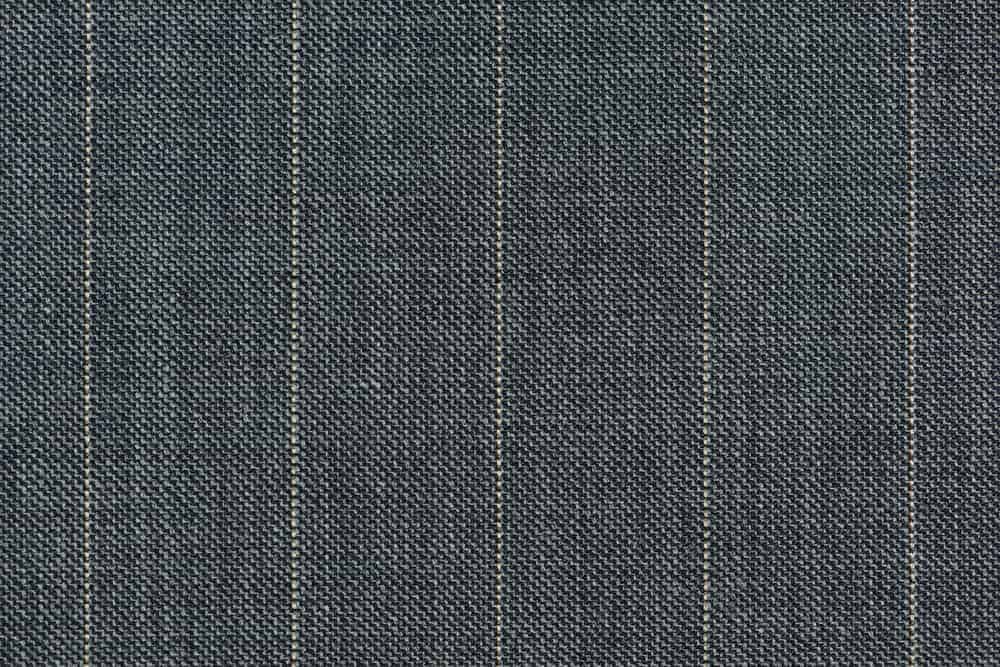
This pattern is a staple in business attire, especially a men’s suit. Most of the time, the stripes are white, but sometimes they come in gray. Because the lines run up and down, they tend to elongate your figure so you look taller. A caveat about pinstripes though: Chalk stripes can draw undue attention to your midsection, making you look bigger in a way that’s not flattering. (Chalk stripes are thicker, spaced more widely apart, and less defined than traditional pinstripes).
Herringbone
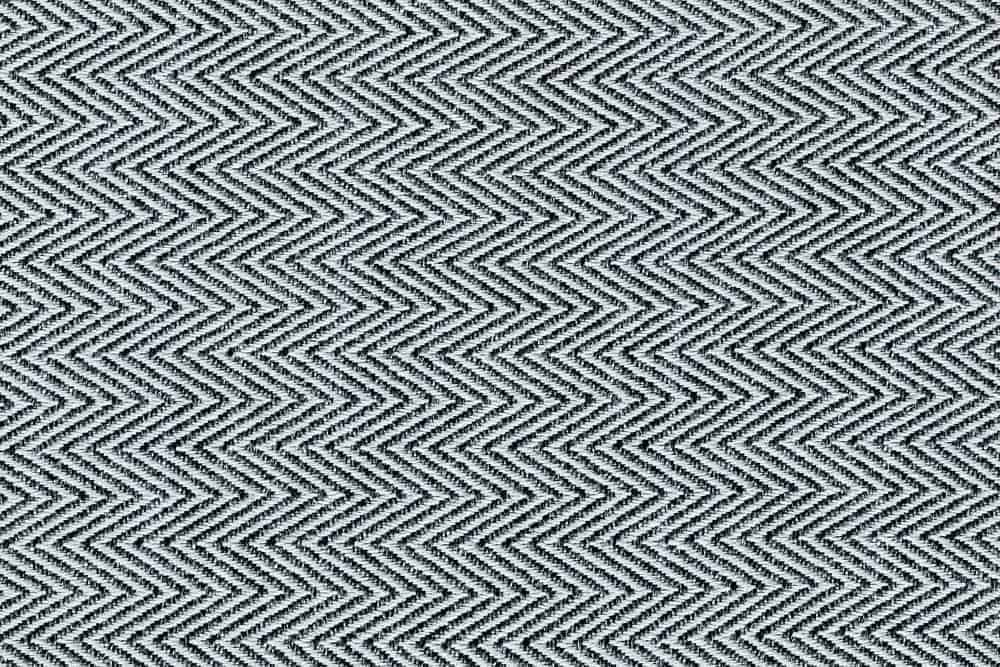
This style is so named because it’s supposed to look like the skeleton of a herringbone fish. The best way to describe this intricate pattern is slanted lines running in alternate directions. They’re bordered by parallel lines to form a series of V shapes. Herringbone is often woven into wool. It’s a good material for a casual coat or jacket. Herringbone looks good with jeans. Somehow, it manages to look rugged and professional at the same time.
Nailhead and Bird’s Eye
These are simple and can be an excellent wardrobe staple because finding articles of clothing to match them is usually pretty easy. From a distance, the nailhead and bird’s eye look like solid colors, but actually, appear as tiny textured dots. As you might expect, nailhead dots are squared off, but bird’s eye dots are round. These patterns look good on a sports jacket or suit.
Solid Colors
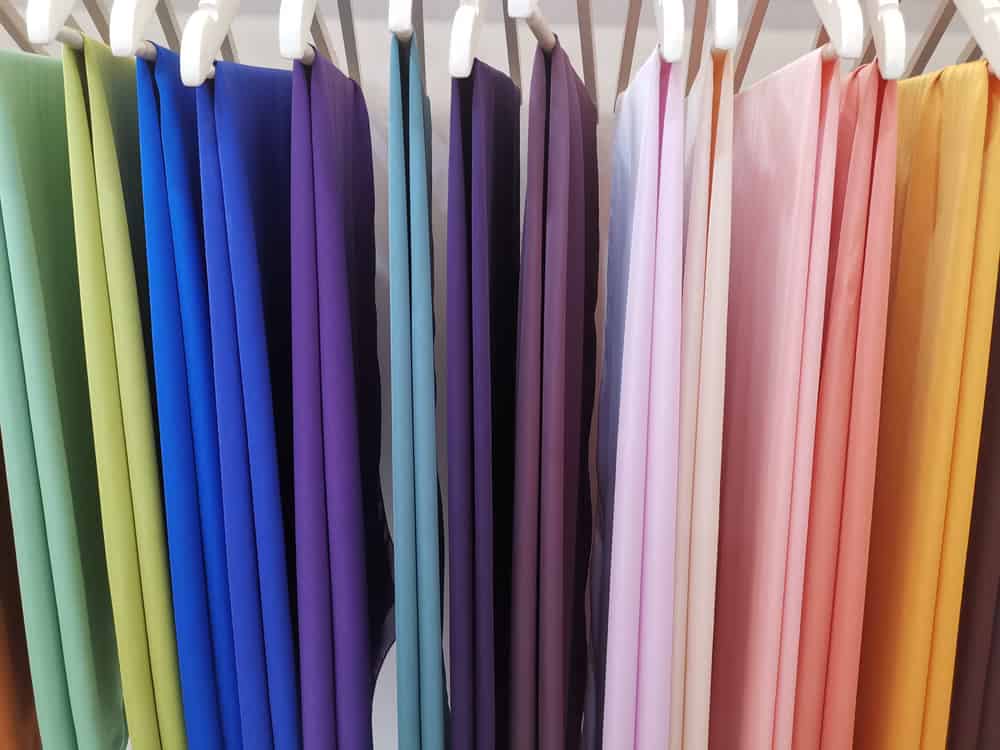
And if you’re not so sure about patterns or don’t know what looks good for a particular occasion, you can always go with the old standby: solid colors. These are easier to mix and match with the appropriate colors, or even a pattern. Solid colors make life easier when you want to keep it simple.
Checks
This is the pattern that’s created when you have squares formed by straight lines running vertically and horizontally. Here are some variations of the checked style.
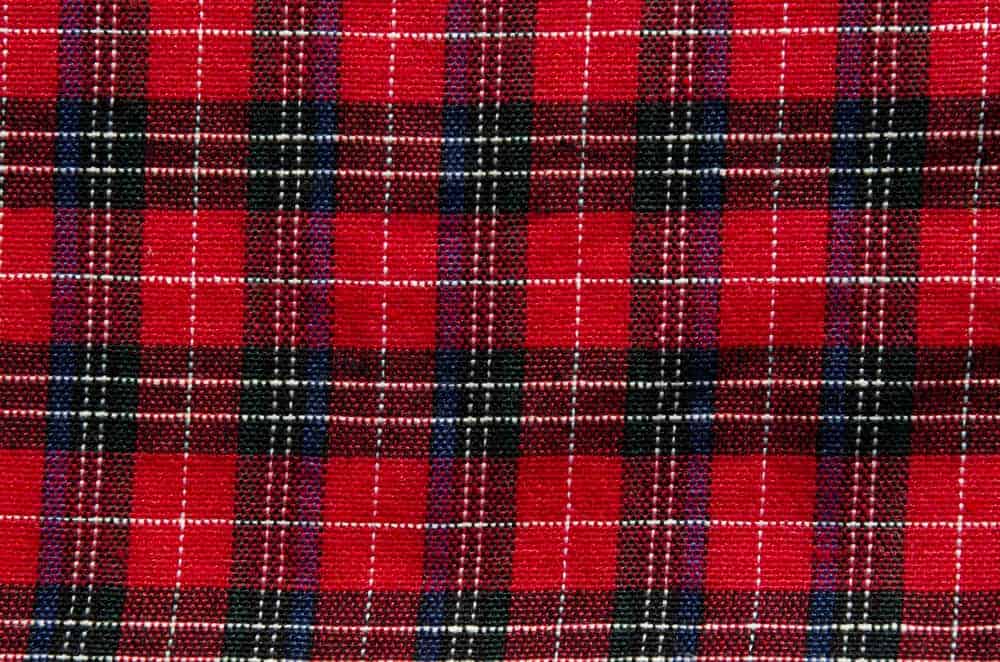
Plaid
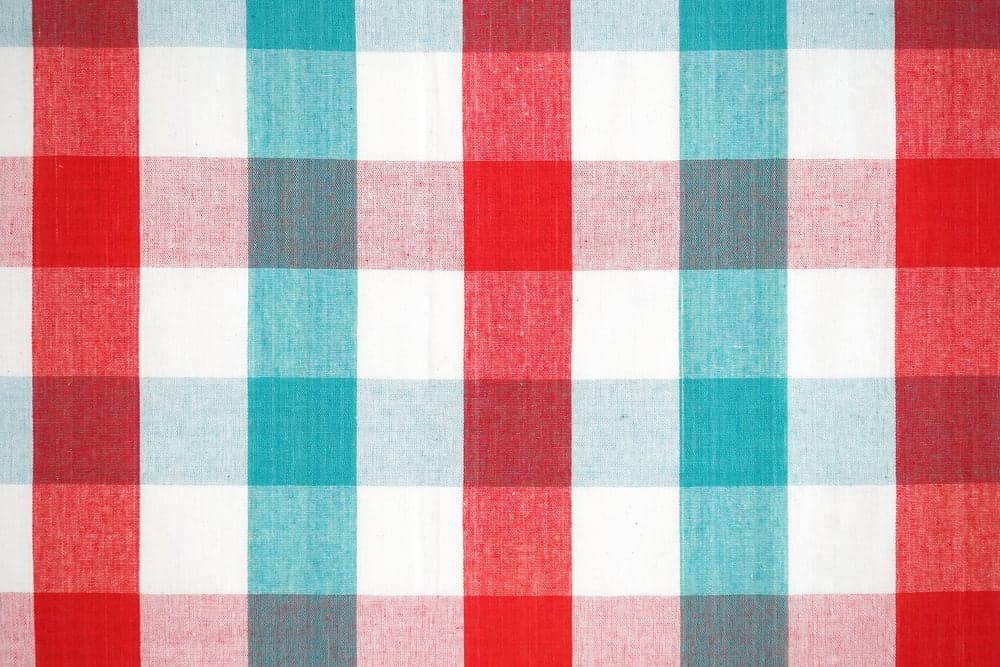
When you have horizontal and vertical lines of multiple colors, that’s plaid. Plaid is a pattern you’ll frequently see in flannel and other casual clothing, especially button-down shirts. Every once in a while, you might see a brave gent sporting a plaid suit. This definitely goes against the grain, but you can get away with it.
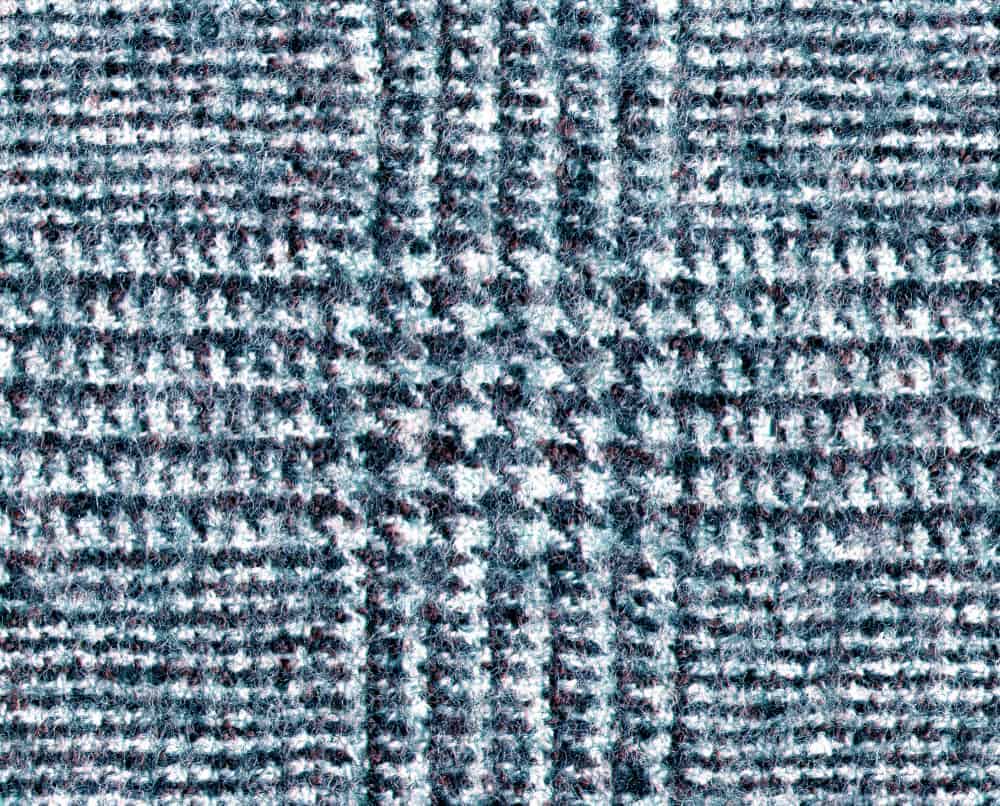
Houndstooth
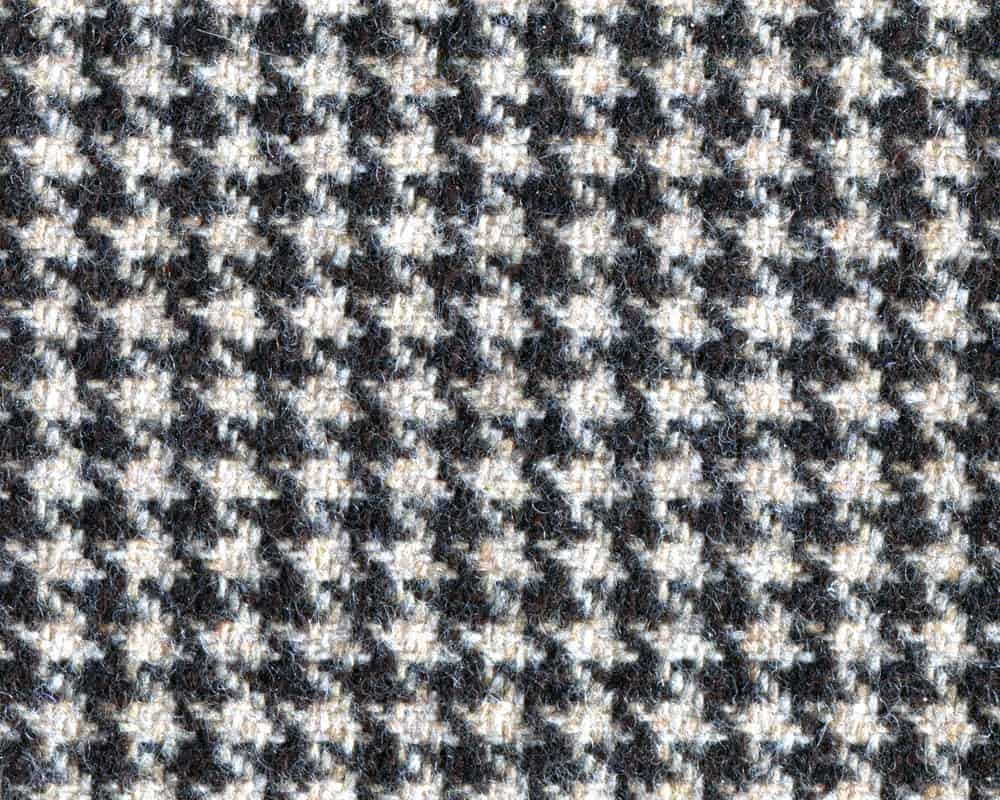
This pattern gets its name because the checks look like hounds’ teeth. They are uneven, broken, and have pointy edges. In their most traditional form, houndstooth checks are small and appear in a black and white pattern. You’ll see this pattern on tweed articles, as a sports jacket or overcoat. These checks can be seen in a variety of colors. And when apparel is designed to make a statement, those checks may be quite large.
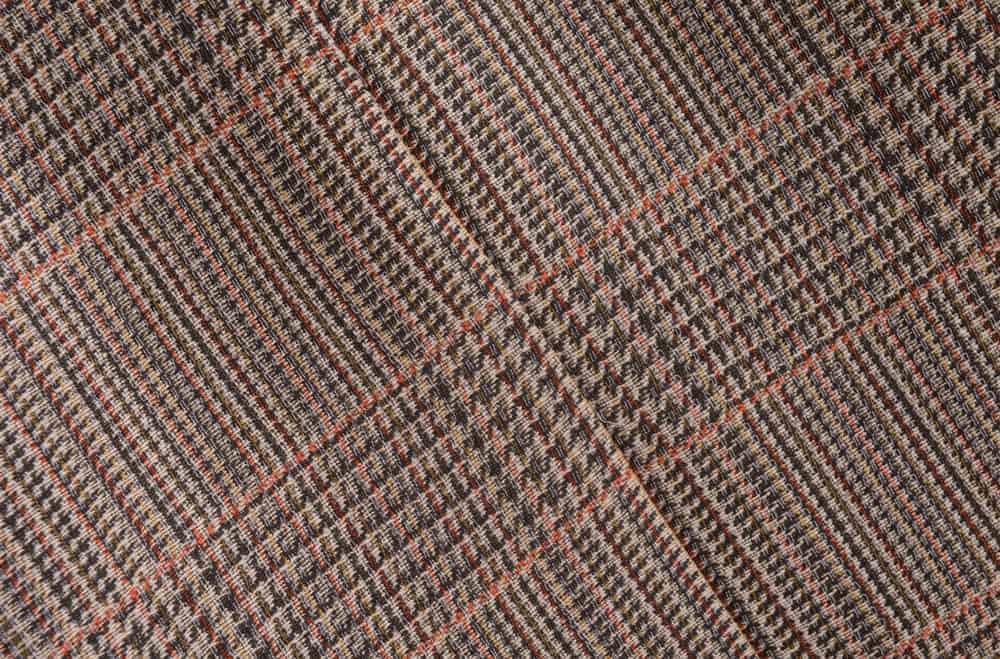
Glen Check
Glen check is a good choice if you are looking for a style that’s somewhat conservative but has a little more variety than solid colors. This pattern consists of closely-spaced crisscrossed lines. At the center of the tiny squares where the lines intersect is a houndstooth. Many men’s suits have this pattern, which is also sometimes called glen plaid or Prince of Wales check. (The latter name came about because King Edward VII popularized it).
Windowpane
This pattern is true to its name since that’s just what it looks like. Widely-spaced checks can make clothing look classy. However, this style isn’t recommended for highly formal occasions. Lots of suits and dress shirts are styled this way because windowpane checks go well with most guys’ heights and build. Plus, it’s usually easy to find a matching tie. Just go with a color that complements the “frames” of the “windows.”
Madras
Madras describes a cotton fabric as well as a couple of design types. One consists of brightly-colored lines that are unevenly spaced and of varying thicknesses. It’s a type of plaid all its own. Madras can also take on a quilt-like form, with squares or patches of plaid in various designs scattered throughout. This print is most often worn during the summer and in warm-weather climes.
Gingham
Back in the day, when people said “gingham,” they usually meant a type of fabric. Nowadays, though, it usually describes a design consisting of evenly-sized, single-colored squares on a white background, like a checkerboard. You’ll see a lot of casual button-down shirts fashioned this way.
Sewing Patterns for Menswear and Womenswear
If you enjoy sewing your own clothing, there are plenty of places to find patterns. Your local craft or fabric store should have some. Additionally, the internet is a treasure trove of patterns and DIY tips. You can find more modern styles, as well as vintage sewing patterns. And if your body doesn’t fit conventional size charts, you can tweak those patterns so they’re tailored to you, or whoever you’re sewing for.
What Is a Sewing Pattern and Why Should You Use One?
The first time saw a sewing pattern, it was a little confusing, to say the least. It was like looking at a blueprint for a building when you have absolutely no background in architecture. You might think it’s better to cut clothing directly from the material you’re using, without a guide.
This rudimentary “pattern making” is probably easy enough for small, simple items like oven mitts. But it can get complicated with more intricate endeavors. Even if your handwork turns out all right, you’re probably putting yourself through more work than you need to.
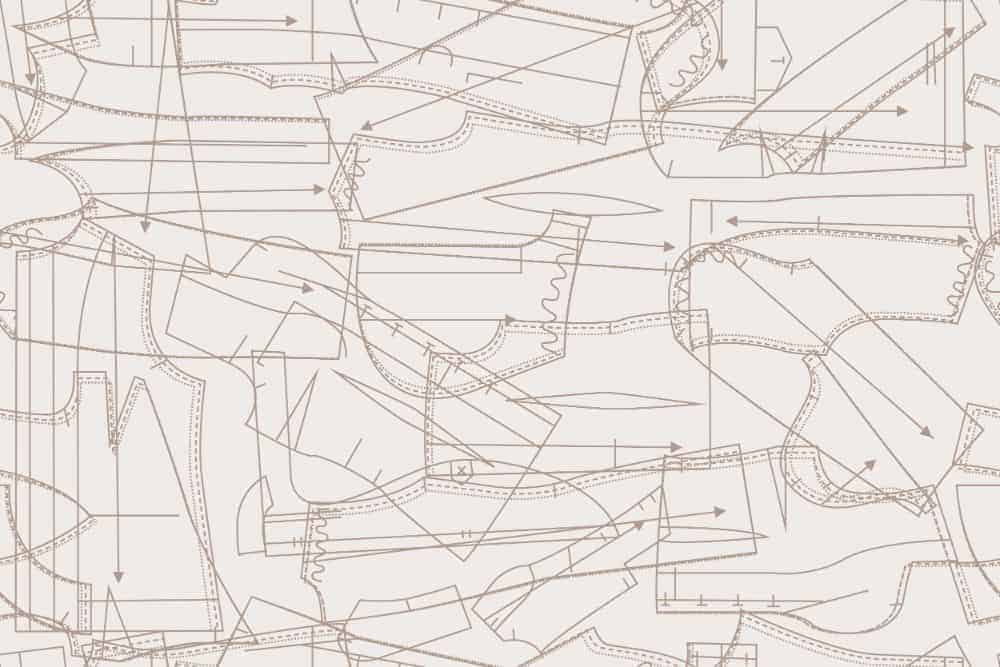
A pattern shows you how to sew an article of clothing of a particular size. It shows you the outline of the garment, not unlike a stencil, so you can cut the material accordingly. Sewing patterns also come with directions so you know how to fit all the pieces together. They give you all the steps in a logical sequence so you can sew everything together in the right order.
Here’s an example. Let’s say you want to follow a pattern to sew a T-shirt. Your pattern will contain outlines of four pieces: the front, the back, the neckband, and the sleeve. You’ll need to cut the front piece and back piece on the fold of the material, then cut out the sleeves and neckband. The guide will show you how to attach everything to get a final, finished product that you can comfortably wear.
These patterns come in multiple sizes so you can cut your material to the fit you want. The dimensions for each size are drawn in nested lines so you can cut the garment out directly from the pattern without having to make any other adjustments or complicated measurements.
What Are the Different Types of Sewing Patterns?
Sewing patterns come in two main types.
Digital Patterns
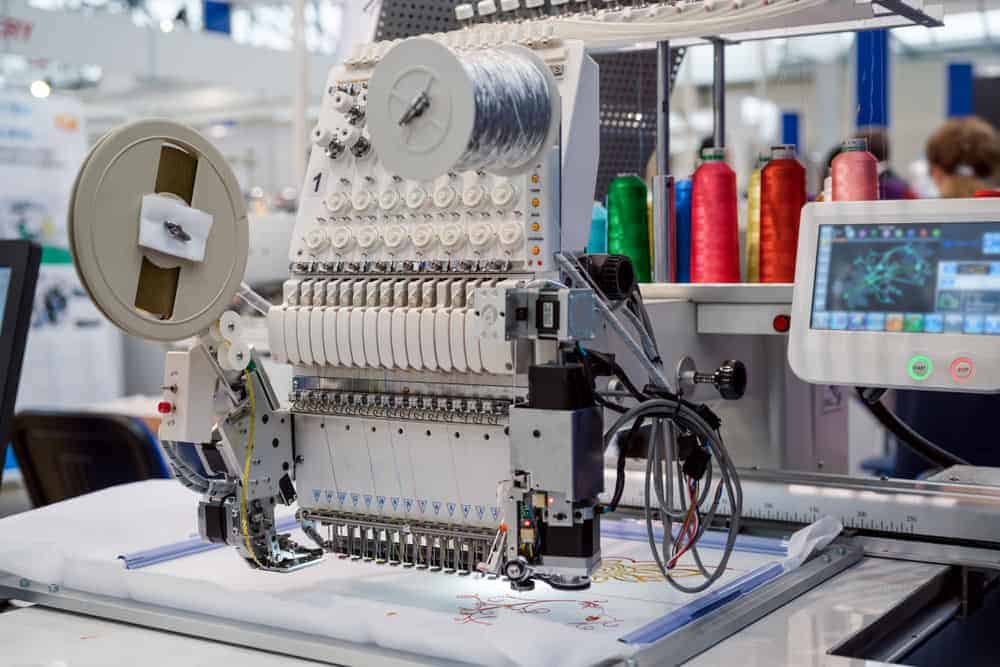
With so much information available online, it’s becoming increasingly common to find sewing patterns that you can download and print. When you purchase these digital guides, you have two options for printing them. You can print them on A4/US letter sheets of paper using your home printer.
One disadvantage is that you will have to tape all those pages together. These can be a bit cumbersome with complex patterns that may consist of a few dozen pages. To save time and effort, you can also print your patterns on AO sheets at a printing shop.
With downloadable patterns, you don’t necessarily have to print out the directions. To save paper, you can just follow along on your device. Another digital tool is pattern maker software for fabric design.
Paper Patterns
These are the “old school” kind with the pattern and instructions provided in hard copy form. High-end companies often use silk paper for their patterns. This type of paper is expensive, so you’ll see that reflected on the pattern’s price tag.
A smaller, independent pattern company is more likely to make their sewing guides available on heavy paper that’s more like the kind you use for your home printer. You can usually come by these patterns at a somewhat lower cost.
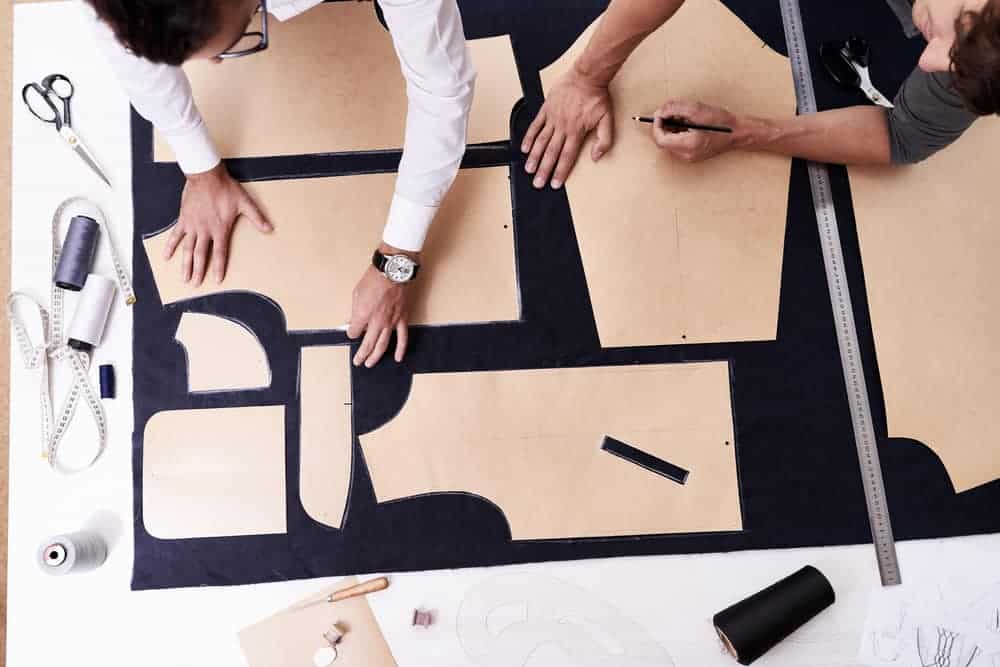
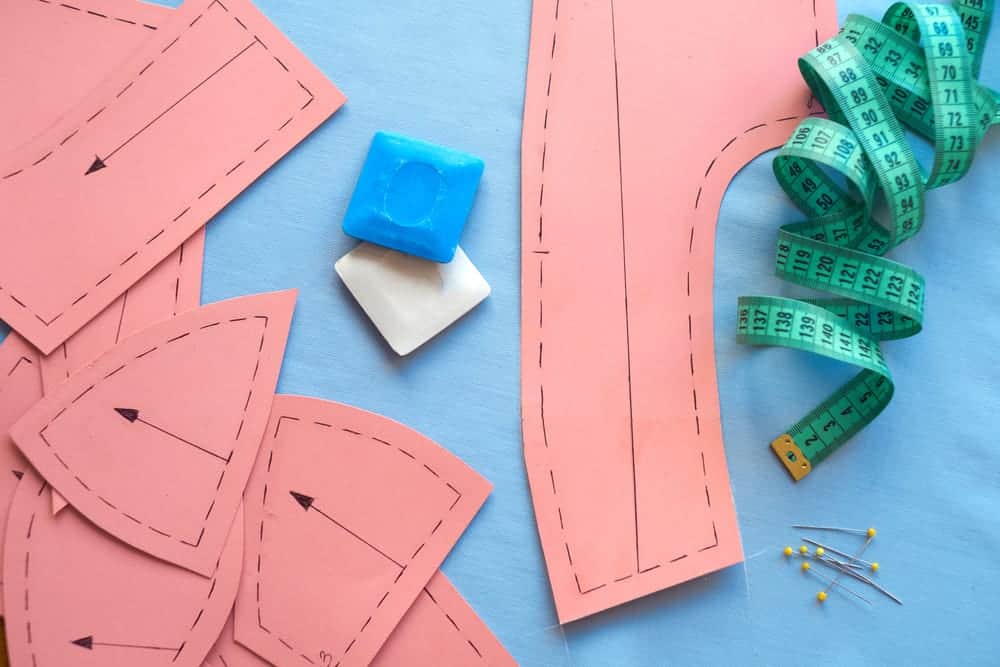
How to Cut Out Sewing Patterns
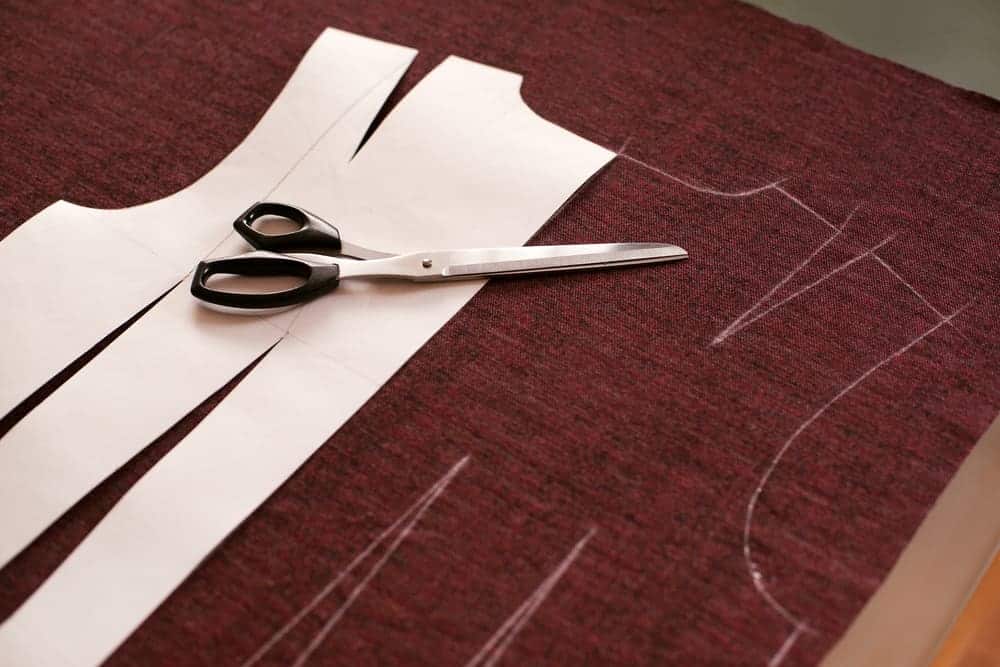
There are a few ways to do this. You might want to try more than one technique to see which works best for you.
The fastest method is to cut the pieces directly from the paper. But you may want to preserve the original pattern. If that’s the case, trace it onto another piece of paper and cut that one instead.
There are a couple of scenarios when you can’t cut from the original guide. This happens when:
- Seam allowances aren’t included. (We’ll talk about those in a few minutes).
- The pieces overlap or the pages have pieces printed on both sides. Magazines and books frequently utilize double-sided printing to conserve paper.
- Patterns contain fabric layouts that tell you exactly how and where to cut. Cutting the pieces for symmetrical garments requires that you fold the material lengthwise and right sides together. To cut the material into two layers, you’ll need to ensure that the edges (also called selvage) align together.
However, some patterns are exceptions to this, so the rules are a little different. Here are some tips for “off the beaten path” patterns.
- Some pieces only need to be cut once.
- When the fabric is exceptionally unstable or thin, it’s best to just cut it in one layer. Other instances that call for one-layer cutting are when you want to save fabric or match up the prints on it.
- For some pieces, you’ll have to cut on the bias.
When you’ve gotten the hang of how all the pieces go together, you will need to lay them out on the fabric. Once you pin the paper to the material, you can cut around the pieces.
What’s a Seam Allowance?
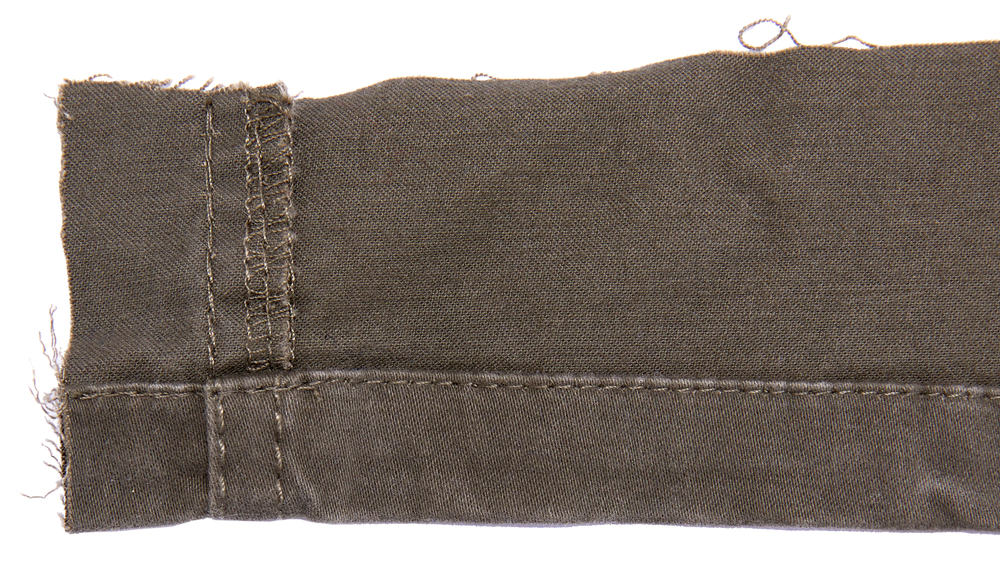
Some patterns include seam allowances (such as for a shoulder seam), in which case all you have to do is follow the guide. Allowances are printed on the part that’s drawn.
If they are not, you will need to add them yourself. You can do this by tracing the pattern onto another sheet of paper, then adding the extra distance to the edges and marking your paper accordingly.
Or, you can trace the pattern onto paper as-is and then mark the seam allowances directly on the fabric after you copy the pattern onto it. Either way, this is definitely more of a chore than simply using a pattern with the allowances already included.
These allowances are necessary to make sure your apparel is the right size. Normally they’re sewn on the inside of clothing. But if you’re incorporating them as decorative elements, they should be on the outside. Seam allowances are usually 1 or 1.5 cm. If you’re using a sewing machine, you can follow the seam guide on it, which is just to the right of the needle.
Free Sewing Pattern
If you want to start sewing your own wardrobe, you may not want to shell out a lot of cash for patterns. After all, you’ll be spending enough on material and other supplies. Sometimes, a free sewing pattern even comes with a free sewing tutorial. Here are some things you can make with free sewing patterns.
Women’s Pattern
There’s virtually no limit to what you can do with these patterns. You can make a variety of dresses and skirts, T-shirts, camis, jackets, and even a jumpsuit or pajamas. There are guides you can download for making drawstring pants.
You can sew different styles of sleeves and necklines, too, not to mention accessories, like bows and belts. Whether you’re a beginner or a seasoned sewist, you can find a free pattern that fits your skill level or provide a little challenge if you want to get out of your comfort zone.
Men’s Patterns
There are also plenty of free resources for men’s clothes. You can sew everything from boxer shorts to trousers to ties. Some of the most oft-used men’s clothing patterns are those that allow you to make a men’s fleece hoodie or men’s shirt.
Men’s sewing patterns come in several sizes and can be adapted for a more unisex fit. There are also tutorials to help you figure out measurements. With these patterns, you can also make accessories like suspenders and grill aprons.
How to Select a Sewing Pattern
If you’re new to sewing, the vast selection of patterns available may leave you uncertain about where to begin. Here are some suggestions to help you get started.
- Ideal for amateurs are patterns marked as “simple,” “easy,” “quick,” and “for beginners.”
- If you’re looking for something simple, look for patterns consisting of just a few pieces. If you have lots of experience in the sewing department or want to take your skills to the next level, look for something more complex.
- If you’re trying your hand at something new, consider buying patterns from a place where you can get plenty of advice if you get stuck or just want some pointers.
- Make sure you select a pattern that’s the right size. To do that, you’ll need to have a good grasp of body measurements.
- If you can find reviews on a particular pattern, check those out to see what others are saying about them. Then you can find out ahead of time how difficult they are so you’re not left to essentially re-invent the wheel. There are sites dedicated to pattern reviews, and you may want to head over there first to get inspiration for finding a pattern.
Clothing Pattern Terminology
There’s a bit of jargon in the world of patterns. Here’s a breakdown of some frequently-cited terminology to make sewing garments and choosing patterns less of a guessing game.
Adjustment line– shows you where you can shorten or lengthen a clothing item
Alter– describes how to adjust a pattern to custom-fit a garment
Anchor stitches– stitches that you sew with zero stitch length. The purpose of these is to anchor your sewing, which is usually done by stitching backward.
Armscye– the opening in the bodice to which a sleeve is attached. This is also known as an armhole.
Basting– a row of longer running stitches used to hold the fabric together temporarily until you can put the proper stitching in
Bias– (usually called “the bias”). This refers to the direction of a woven fabric – typically a 45-degree angle to the diagonal direction or grainline of the material.
Buttonhole placement– the cross symbol on a pattern that shows you where buttons go. (A solid line tells you how long the buttonholes should be).
Cutting layout– basically a map that indicates how you should fold the material and position the pieces for the most efficient, economical use of your fabric
Cutting line– the outer line marking the size
Dart– the tapered fold on a pattern. It gives the clothing fullness while allowing you to shape it according to a specific body contour. All you have to do is mark and fold the material on the centerline, match up the dots, and stitch to the point.
Dots, squares, triangles- areas on a pattern that call for high precision in clipping, gathering, matching, or sewing
Ease– describes the ease of wearing or designing. This indicates how loose or form-fitting a garment is. Wearing ease indicates how well it should move with your body. Designer ease has to do with style elements.
Easing line– a short broken line with dots at either end a directional arrow. This line marks the area that must be eased.
Fold line– denotes where garment pieces have to be placed on the fabric’s fold. This allows you to avoid unnecessary center seams.
Grainline– suggested direction to place pattern pieces on the fabric with arrows parallel to its edge (selvage)
Hem allowance– the amount of fabric required for hemming (usually
Line drawings– outlines of the shape of the design, plus details such as the locations of seams and zipper placement
Notches– diamond shapes that appear on the cutting line so you can match the seams
Pattern layout– diagram on the instructions sheet showing the proper layout of the garment pieces on the fabric
Placket– slit or opening that covers fastenings or allows access to a pocket
Seam allowance– the distance between the fabric edge and the stitching
Seam line– long broken line indicating the placement of seams. These lines, rather than the raw edges of the fabric, need to be matched up before you sew.
Toile– a “test” garment used to make sure a garment fashioned based on a pattern will fit properly. Since it’s not the “real thing,” it’s normally made of an inexpensive material like calico.
View– designs on a paper pattern piece to show other possible style options – variations in hem length, long sleeve vs short sleeve, etc.
Yardage block– shows how much fabric lining and interfacing are needed to make a particular view
Measurement Terms
Back waist length– distance from the middle of the most prominent bone at the base of the neck to the waistline
Bustline– the horizontal line that runs across the back and the fullest area of the bust. This must be taken into account for appropriate pattern sizing. When the measurement begins at the fullest part of the bust and extends across the back, it’s called a full bust.
High bust– measurement above the full bust, under the arms, and around the back and the chest. If this measurement exceeds the full bust measurement by more than 2″ (5 cm), select a pattern according to the high bust size and make any needed alterations.
Hip point– measurement around the fullest part of the hip. (If a pattern doesn’t have both hip and waist measurements, pick a pattern based on hip measurements.
In-seam– inside leg seam running from crotch to hem
Waistline– the thinnest part of the body (sometimes contrary to popular belief). To gauge waist size, tie a length of string around your middle and let it naturally settle at your waist.
Fabrics to Use for Particular Types of Apparel
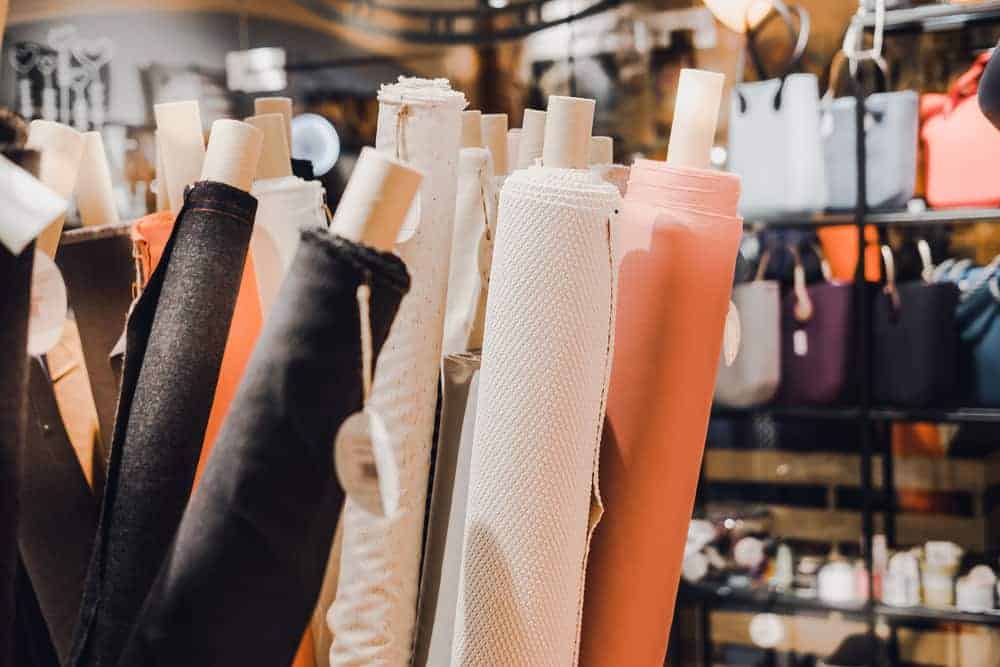
When making your own apparel, you may not always be sure which fabrics are best for a particular item. Here’s a breakdown of material options.
Pants
When you need a pair of loose-fit pants for relaxing around the house, wool, Tencel, non-stretch denim, rayon challis, linen, and cotton-linen blends are probably the best to use. For fitted pants, use stretchy denim and twill.
Shirts
Rayon challis, silk, double gauze, cotton voile, cotton lawn, chambray, and Tencel are good materials for making loose-fitting shirts. You can also use linen and cotton-linen blends. For something a little warmer, flannel works great.
If you want to sew a physique-flattering fitted T-shirt, go with a cotton spandex jersey or similar knit fabrics. Other “doable” T-shirt materials include dana knit or tri-blend jersey and bamboo rayon spandex.
French terry is often used for sweaters and sweatshirts. You can also sew these articles with sweater knit and sweatshirt knit, respectively. Wool and other knit fabrics are common sweater materials, too.
Skirts and Dresses
Sewists frequently opt for heavier knits, twill, quilting cotton, silk, or denim when fashioning pencil skirts. For any other skirt style, rayon challis, Tencel, cotton lawn, cotton-linen blends, and linen work well.
Several options are possible for dresses. For something that’s going to be worn in cool weather, wool is a wise choice. Otherwise, you can sew with cotton lawn, cotton voile, double gauze, silk, satin, Tencel, linen, and rayon challis.
Lining
If you want to sew a lining into something, flannel or flannel back satin may be a good fit for this purpose. Lightweight polyester with a slippery texture works, too.
FAQs
What supplies do you need for sewing clothes?
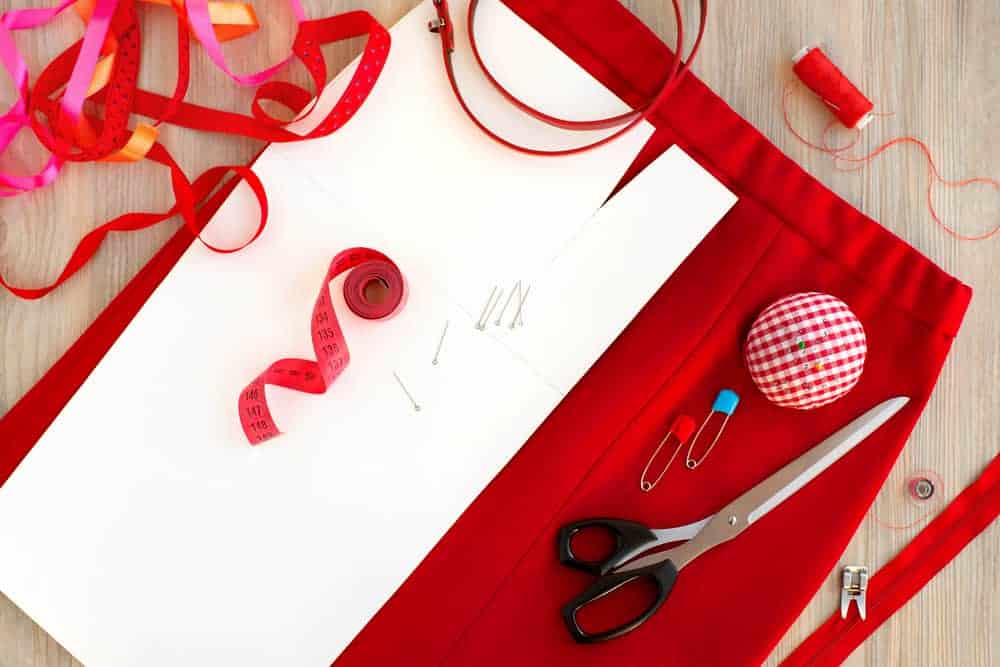
First, while it’s possible to fashion these items by hand, it will take quite a while. So it’s best to have a sewing machine. A simple one is the best way to go when you’re just starting out. You will also need a good sewing kit, complete with tailor’s chalk or some kind of temporary marking device, thread, pins, and needles.
A good pair of fabric scissors is a must for a sharp, clean cut. Having a small pair on hand is helpful too, for trimming seams and snipping stray threads. Of course, you’ll want a ruler or a tape measure for accuracy in cutting the right dimensions. Steam iron is helpful for pressing the material.
How do you prepare fabric for sewing?
Especially if your fabric is made of natural materials, you will need to pre-shrink it in the washer and dryer first. Using detergent isn’t necessary, but it helps get rid of excess dyes in the material. Waiting until after you complete your project for initial washing and drying will result in flaws caused by shrinking and stretching.
Next, straighten the fabric’s grain to prevent uneven edges or prints that don’t match up correctly. Line up the selvedges to ensure a straight edge on both cut sides. To prevent traveling, you can serge the cut edges. Once you’ve located the crosswise grain, you can:
- Use the pattern of the fabric to cut a straight line that is perpendicular to the selvedge edge.
- Pull out one of the threads of a loosely-woven material. If it runs perpendicular to the selvedge edge, cut along the line left by the missing thread.
- With tightly-woven materials, it’s sometimes possible to tear them straight along their crosswise grain. Just make a little cut into the selvedge edge of the material and rip it across the crosswise grain. Rip quickly for maximum straightness.
The last prep step involves ironing and folding your fabric so it’s ready for laying out the pattern pieces.
How do you choose the right fabric for sewing clothing?
Select the style you want and choose a print accordingly (vogue patterns or a vintage pattern). Also, consider the color of the material and the size of the print. You’ll definitely want something that feels good on your skin.
If the article you’re sewing is likely to see a lot of wear, choose a material that is durable, can withstand frequent washing, and isn’t high-maintenance or too costly. Think about the versatility of the material. For instance, you can sometimes use quilting fabric for heavier garments.
You’ll probably also want to go with a fabric that’s easy to work with and isn’t too difficult to come by.
Can you buy plus-size patterns?
Yes. A variety of retailers sell plus-size patterns for women’s clothing. This spans a wide range of bust sizes and body contours. There are also patterns in larger sizes that you can download for free.
What are some recommendations for sewists just starting out?
If you’re just beginning to sew your own clothing, start simple. You don’t need a fancy sewing machine. Your first few attempts probably won’t be perfect, so, if you don’t want to spend a lot of money, consider buying inexpensive material or even scavenging thrift stores to find some.
You may be surprised at what you can do with vintage curtains or tablecloths. Also, if you are left-handed, make sure you have the appropriate scissors. Start out with a simple pattern to make things easier.
And don’t rush; allowing plenty of time for the project will make it less stressful and more enjoyable.